An old door hinge often gives clear warnings: a sagging corner, a dark rub mark, or a squeak that returns after lubrication. These signs may point to worn hinge pins, loose screws, or hinges that no longer match the door’s weight. Replacing them can improve movement and help the door sit evenly in its frame. But the hinge is only one part of the problem. A swollen door or shifted frame may need separate attention.
The age of a home makes this repair increasingly relevant. Harvard’s Joint Center for Housing Studies reported in The State of the Nation’s Housing 2023 that the median age of owner-occupied homes reached 40 years in 2021, up from 31 years in 2001. Older homes may have decades-old hardware, mismatched screw holes, or layers of paint around hinge leaves. Age alone is not a diagnosis. Check the door, frame, and fasteners before choosing replacement parts.
This 2026 guide explains how to replace old door hinges with new ones, from measuring hinge size to supporting the door during removal. It also draws on the Builders Hardware Manufacturers Association’s ANSI/BHMA A156.1 standard for butts and hinges when discussing hardware terminology and performance. Small details matter: hinge radius, leaf thickness, screw length, and alignment can affect the result. A careful fit beats a rushed swap. And, honestly, not every squeak means the hinges need replacing.
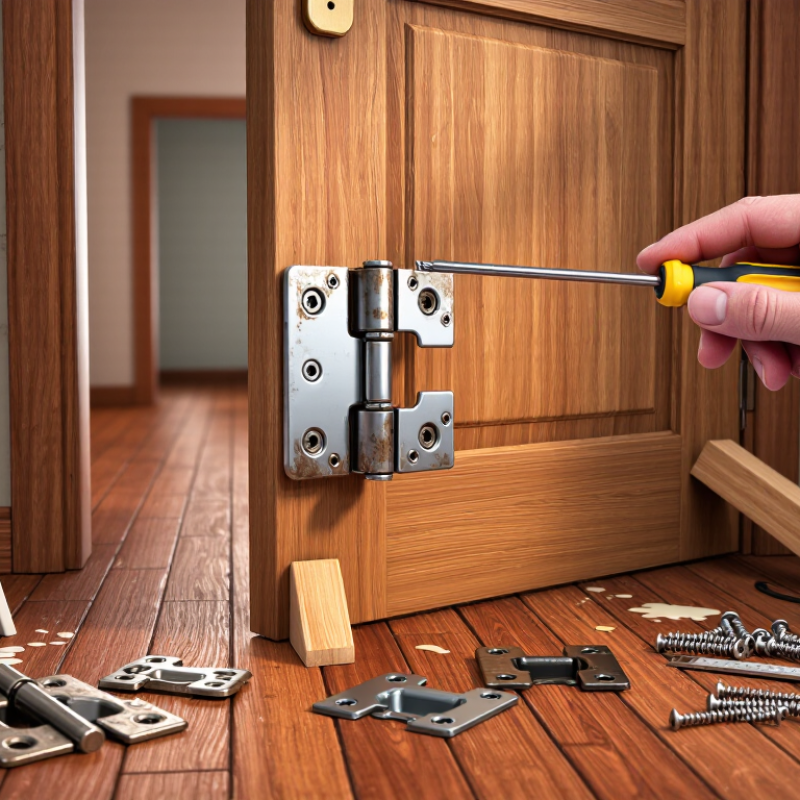
A door hinge is a small load-bearing joint, but its type affects how a door moves and wears. Common options include plain butt hinges, ball-bearing hinges, spring hinges, and continuous hinges. Plain butt hinges suit many interior doors; ball-bearing versions reduce friction on heavier, frequently used doors. Spring hinges help doors close automatically, while continuous hinges spread the load along the door edge. Choose based on door weight, traffic, frame condition, and screw pattern—not appearance alone.
The Builders Hardware Manufacturers Association’s ANSI/BHMA A156.1 standard classifies butt hinges through cycle testing. Its benchmarks include 500,000 cycles for Grade 3, 1.5 million for Grade 2, and 2.5 million for Grade 1. These are laboratory thresholds, not guaranteed service life at home. Poor alignment, moisture, and loose fasteners can shorten real-world performance.
Watch for scraping at the threshold, a door that drops at the latch side, loose hinge pins, or screws that keep backing out. Rust and metal dust around the knuckles also deserve attention. A squeak alone is not a verdict. Open the door and gently lift the handle; noticeable movement may point to hinge or frame wear. Diagnosis is not always tidy: a sagging door can result from a worn hinge, but a loose frame can look much the same.
| Hinge Type | Common Use | Typical Signs of Wear | Replacement Considerations |
|---|---|---|---|
| Butt hinge | Common on interior and exterior hinged doors; two leaves join around a pin. | Squeaking, loose screws, visible rust, a bent leaf, or a door that rubs the frame. | Measure the existing hinge height and width, leaf thickness, corner shape, pin arrangement, and screw locations. Match the hinge to the door and frame. |
| Ball-bearing butt hinge | Used on doors that are heavy or opened frequently; bearings help reduce friction at the knuckles. | Grinding or rough movement, excessive play, damaged bearing areas, or persistent noise after suitable lubrication. | Confirm that the replacement matches the door’s dimensions and required load rating. Check that the frame and screw anchorage are sound. |
| Spring hinge | Used where a door is intended to close automatically, subject to the door and installation requirements. | The door no longer closes reliably, closes unevenly, or the spring assembly is damaged. | Choose a hinge designed for the door’s size and use. Follow its adjustment instructions, and check whether local requirements specify a particular closing setup. |
| Continuous hinge | A long hinge running along much or all of a door’s height; can distribute support across a longer section. | Loose or missing fasteners, a visibly bent hinge, damaged knuckles, or binding along the door edge. | Measure the required length and leaf width. Check alignment and fastening points along the full door edge before installation. |
| Pivot hinge | Used on doors designed to rotate around pivot points, often near the top and bottom rather than on side-mounted leaves. | Door sag, uneven gaps, scraping, or wear at the pivot points. | Identify the existing pivot layout and door weight requirements. Pivot hardware is not a direct substitute for a standard butt hinge. |
| Concealed hinge | Common on cabinet doors and some specially designed door systems; much of the hinge is hidden when closed. | Door misalignment, loose mounting plates, restricted movement, or damaged adjustment components. | Match the hinge’s mounting pattern, opening angle, overlay or inset configuration, and door construction. Concealed hinges are not automatically interchangeable with standard door hinges. |
| Wear or alignment symptom: A squeak alone may be caused by friction and does not always mean the hinge needs replacement. A sagging or sticking door can also result from loose screws, damaged screw holes, frame movement, or misalignment. Inspect the hinge, fasteners, door, and frame before choosing a repair. | |||
| Before replacing: Compare the old and new hinge’s height, width, thickness, corner radius, pin style, and screw-hole pattern. Check the door’s weight and intended use, support the door during removal, and use fasteners appropriate for the door and frame. Dimensions and installation requirements vary by door and hinge. | |||
Practical check: Replace a hinge if it is cracked, badly bent, severely corroded, or unable to support smooth, secure operation. If a door is fire-rated or subject to other building requirements, use compatible hardware and follow applicable local codes.
Measure its height, open width, leaf thickness, corner shape, and screw-hole spacing. Check the door thickness, too.
Its holes may not line up, or its leaf may sit proud of the mortise. The door could rub the frame.
Check the hinge’s load rating and bearing type in its technical sheet. Appearance alone is not enough.
They show tested cycle thresholds: Grade 1 reaches 2.5 million, Grade 2 reaches 1.5 million, and Grade 3 reaches 350,000. They do not promise a certain service life.
Gather a tape measure, screwdriver, drill bits, sharp chisel, pencil, and level. Wear eye protection.
Use a door wedge or ask someone to support it. Remove one hinge at a time.
Compare their length with the replacement screws. Screws that are too short may not hold securely. Keep the old ones nearby.
Pause and inspect it before cutting deeper. Soft or split wood needs attention before new screws go in. I still double-check.
This guide explains how to recognize when door hinges are worn, including signs such as squeaking, rust, loose screws, or a door that no longer swings smoothly. It outlines how to choose suitable replacement hinges and gather basic tools before beginning. Careful measurements of the existing hinges, door, and frame help ensure the new hardware fits and aligns with the original screw locations.
Readers will learn how to replace old door hinges with new ones while minimizing the risk of damaging the door or frame. The process covers supporting the door, removing the old hinges one at a time, and fastening the replacements securely. Once installation is complete, the guide recommends checking the door’s alignment, swing, and latch, then making small adjustments if needed so the door opens and closes smoothly.

 MX Lock